We use affiliate links. If you purchase something through the links on this page, we may receive a commission at no cost to you. Learn more.
REVIEW – 3D printers are getting better and better. The best device is probably still one you already own and know how to use, but if you’re looking for new features, faster speeds, or are in the process of spending money on your first printer, there’s never been a better time. Case in point: TwoTrees just released the SK1 CoreXY printer and it was my best experience yet.
What is it?
The TwoTrees SK1 CoreXY is a 3D printer that uses the CoreXY motion structure (more on that later). It’s incredibly fast at up to 700 mm/s, supports Wi-Fi printing, has a large print area of 256 mm³ and supports multiple materials.
What’s in the box?
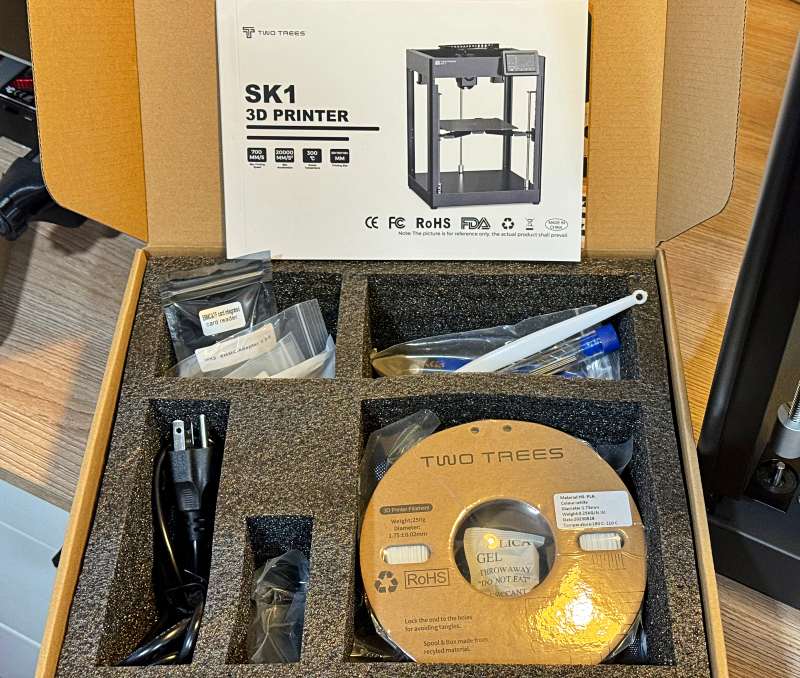
- TwoTrees SK1 CoreXY 3D printer
- Power cord
- Touch screen and holder
- WiFi antenna
- assembly Instructions
- Tools
- Starter roll with filament
- USB-A TF and adapter
Hardware specifications
speed: Up to 700 mm/s | 20,000 mm/s² | Flow 32 mm³/s
Sizing: Print = 256 x 256 x 256 mm | Machine = 400 x 400 x 530 mm
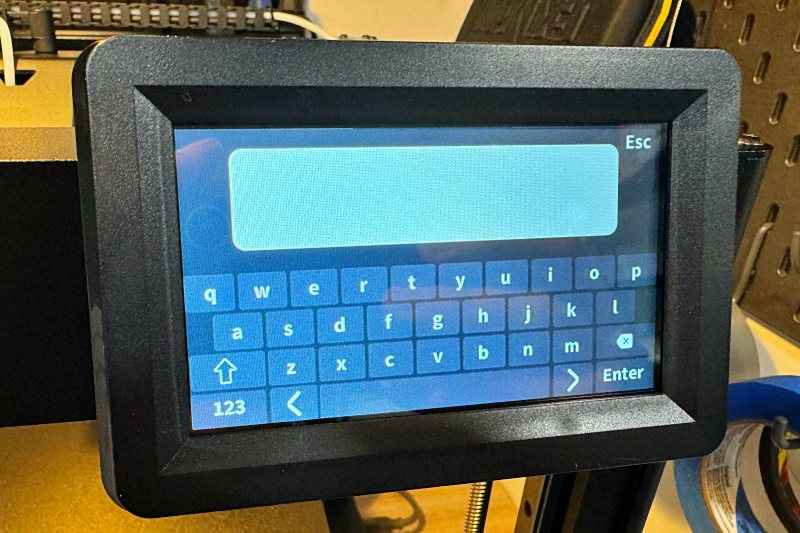
Screen: 4.3″ capacitive color touchscreen
Leveling: Z-Tilt + 36 points bed stitch
Firmware: Klipper (open source) with input shaping, motion advance and more
jet: 0.4mm diameter, filament diameter or 1.75mm, heats to 300°F in 30 seconds
Filament types: PLA | PETG | ABS | ASA | TPU | PC | UltraPA
extruder: Double-aisle direct extruder
Press: USB, LAN, WLAN | Format = G code
Print bed: Magnetic PEI plate
accuracy: Printing = ±0.1mm | X/Y/Z axes = ±0.0025 mm
operating system Support: MacOS | Windows | Linux
Design and functions
The TwoTrees SK1 CoreXY is a 3D printer that uses the CoreXY motion structure. This means that the extruder moves on both the X and Y axes. The print bed has three drive shafts (front left, front right and center back), allowing it to tilt for automatic leveling. A capacitive touch panel allows for easy control and maintenance, while a Wi-Fi or LAN connection enables remote Internet monitoring and comprehensive reporting.
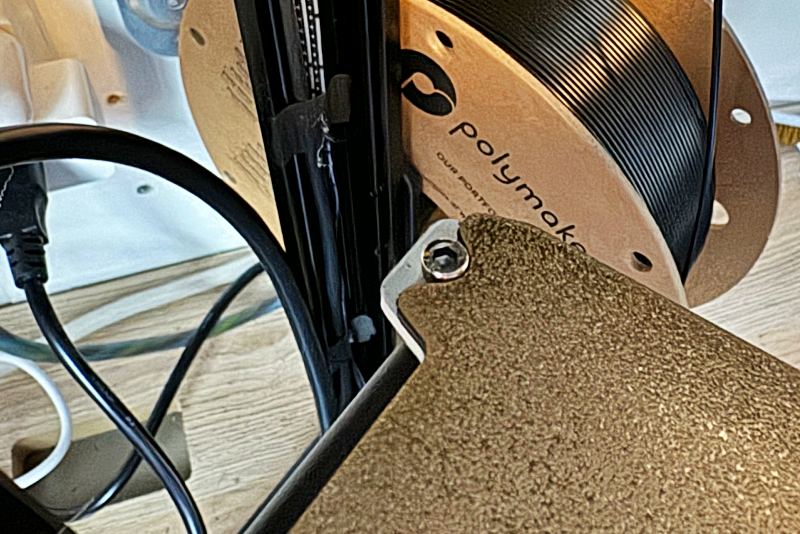
The print bed is heated using a magnetic plate (up to 100°), but with the small detail that anchors are attached to the back to ensure alignment. It just makes things easier and the texture provides a clean look on any surface facing down.
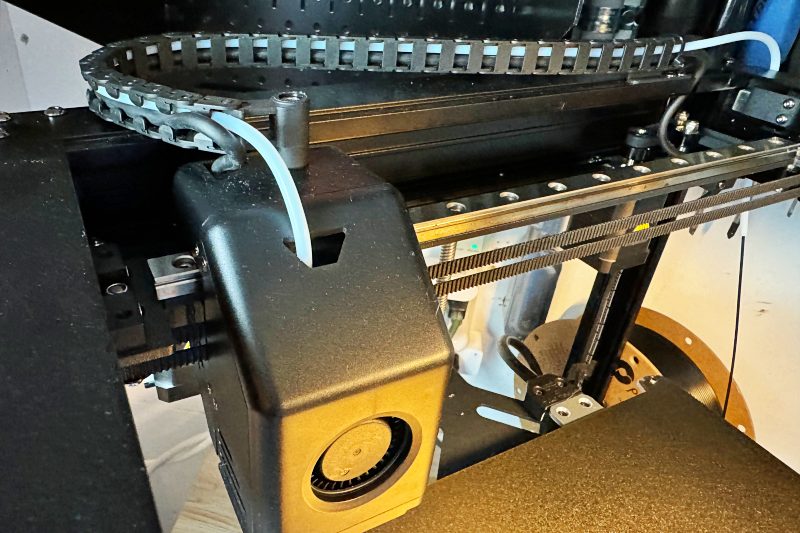
Power and filament to the extruder are already routed through a tank/tread/chain structure, keeping everything clean.
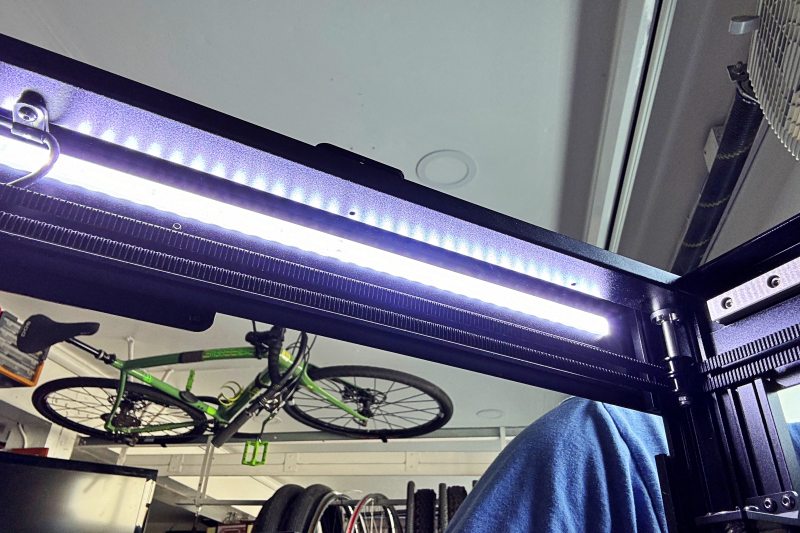
An integrated LED inside the front panel illuminates your prints well during the process.
Set up
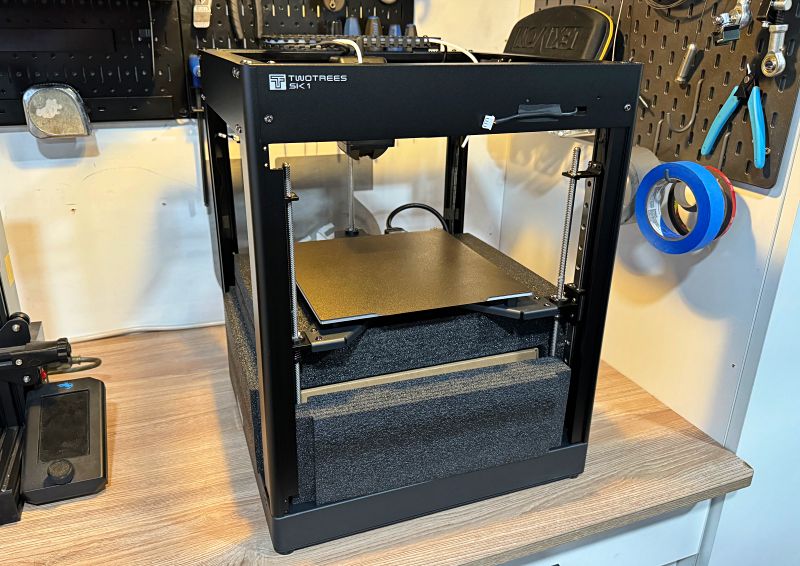
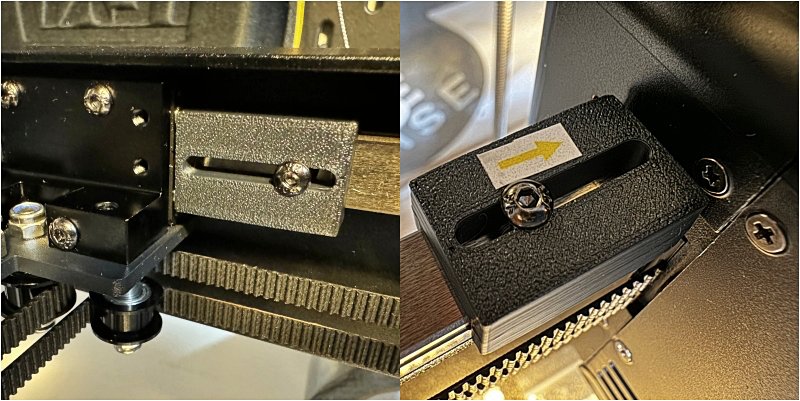
The TwoTrees SK1 CoreXY 3D printer comes almost fully built. The assembly process includes removing some screwed-in transport blocks, assembling the screen and securing the drive shafts. There is a QR code you can scan to check for updated documentation, but let’s walk through it. First, remove the foam pieces that kept everything stable during transport.
Next, remove those screwed-in blocks that held everything in place. Install the included screws where the blocks were. I think there were 8 and a few weren’t on my computer.
Install the filament spool hanger on the right side.
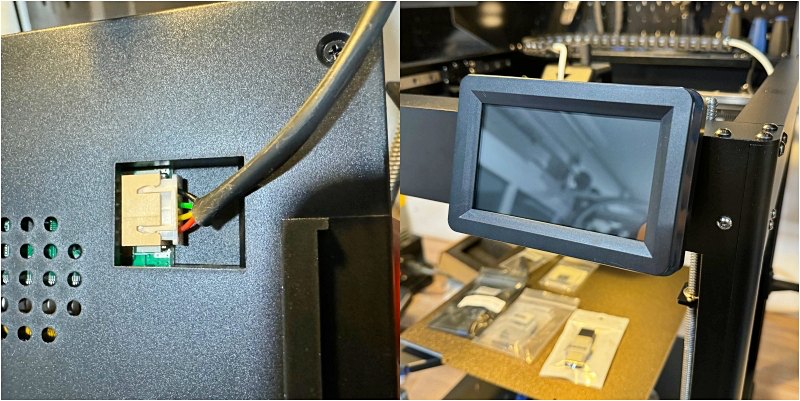
Prepare the screen by disconnecting the cable and installing the mounting bracket.

Connect the cable to the connector on the back of the screen, then slide the screen down onto the mount.
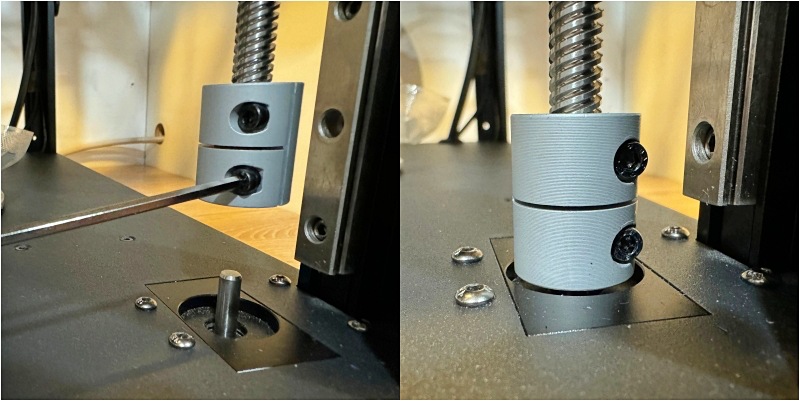
This step had the least amount of guidance. I manually rotated each of the three drive shafts until it was fully lowered and flush with the main surface but above the floor recess to prevent direct contact. Then tighten the bottom screw with the included Allen key. Check the top screw right away.
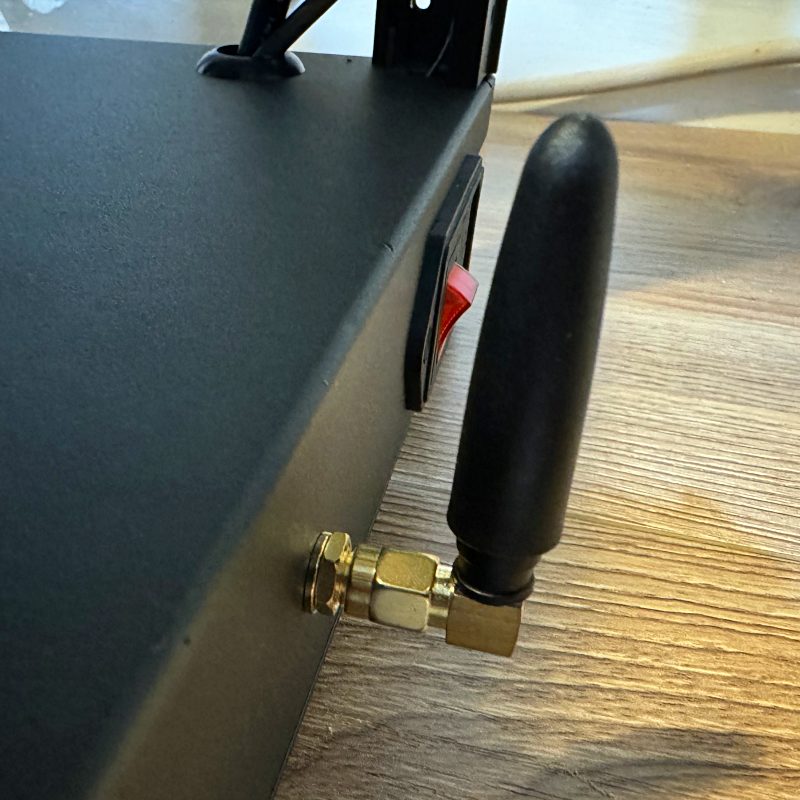
Install the WiFi antenna on the post and you’re ready to go. On the opposite side, make sure the panel switch is set to the correct voltage for your country.
Connect the power cord and press the red switch to turn on the SK1. Take a minute to start, then navigate to the settings screen to set up a connection to your Wi-Fi. Write down the IP address when you see it on the screen as you will need it for remote access via WiFi or LAN.
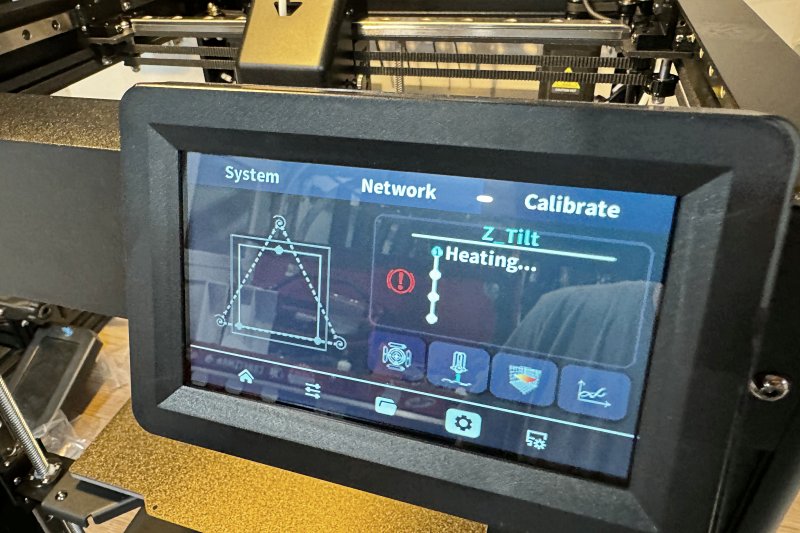
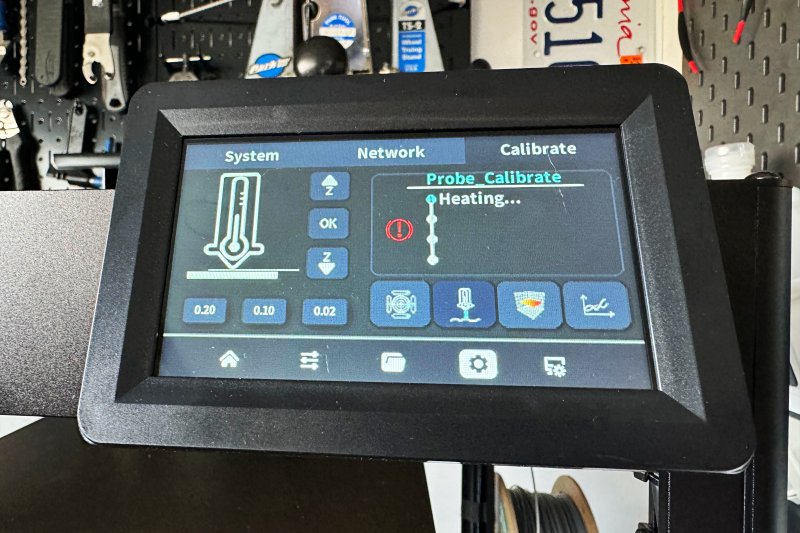
The final step is to calibrate everything. Below is this screen. In order from left to right, press the icon for each of the following items:
Z-Tilt calibration, Probe calibration, Calibration of the bed railAnd Vibration calibration.
All of these are fully automatic and do themselves, except for Probe calibration. After heating, it will take 3 probe measurements and then wait for you to calibrate the final distance using a sheet of paper and the Z up/down control. This is pretty simple, but keep in mind that the down arrow means the probe is moved closer to the bed. This may seem obvious, but since the bed moves up to do this, it can easily become confusing. Additionally, the movements occur in small increments of 0.2, 0.1 and 0.02 mm, and the bed moves away and then closer with each adjustment, sometimes making it seem like it’s not getting any closer. Just start with 0.2, go slowly, and move to finer movements as you get closer. Stop when you feel slight resistance on the paper as you pull.
Attach the filament spool to the hanger and begin feeding the filament into the tube until it stops. The built-in lights should flash twice at this point. Navigate the screen to Controls (one to the right of the home icon) and then select Loading unloadedand press the Burden Button. The extruder should start pulling the filament. If not, you may need to squeeze the filament manually and/or check for hard angles in the tube that prevent the filament from sliding smoothly. The extruder takes over and runs filament for about 15 seconds and then you’re ready.
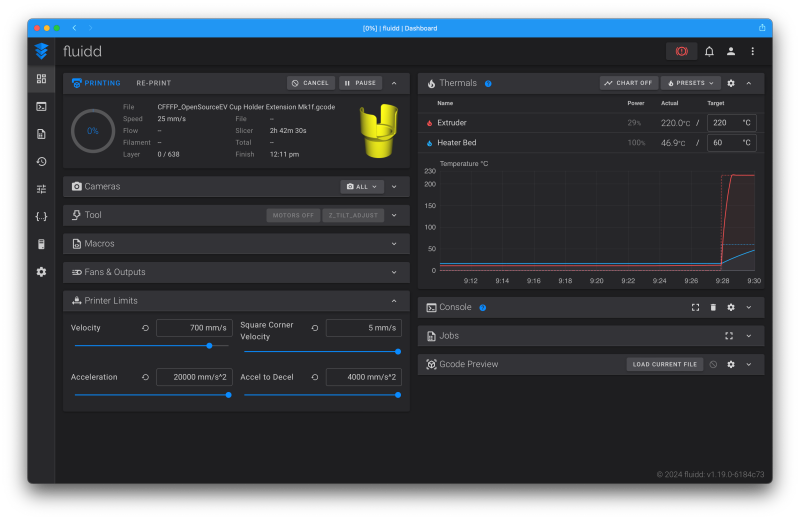
The final step is to open a browser on your computer and enter the IP address you noted earlier. When you press Enter, you will be shown the web interface that you have accessed liquid. Here you can monitor and control almost every aspect of a printing project.
Performance
My experience with consumer 3D printers was limited to two models from Creality. The Ender 7 (also a CoreXY), which I tested two years ago, and the Ender 3 Pro, which I bought after letting my son run away with the Ender 7. I felt pretty comfortable with the 3 Pro, but was looking for more features.
The TwoTrees SK1 CoreXY 3D printer is a perfect upgrade for me. It features a print bed that is 20mm larger in both the X and Y axes, but for me the biggest improvements were the speed and remote control. The ability to use my slicer of choice (Cura) and then send it directly to the printer with a print start command is great. Note that this requires the printer to be turned on.
Both the bed and the extruder heat quickly and maintain the temperature accurately. The hardest part (as always) is finding the best temperatures and settings for each material you want to use. Find a good temperature tower to print and get into the habit of printing one for each new material. It was colder than usual here too and since my printer is in the garage, I had to make a few adjustments for that too.
I had very few problems. I had to increase the belt tension a bit because I had a few slip-ups the first time I set up the bench. During longer builds, the display appears to freeze occasionally and can only be resolved by restarting. I hope there will be a screen firmware update soon to fix this. Since it only recently launched, I expect some updates in the next few months. I also noticed that all sides have a recessed area with threaded holes to accept plexiglass panels. I don’t know if this is in the works or not, but I’ll probably laser cut some myself to help with temperature and humidity control in my garage.
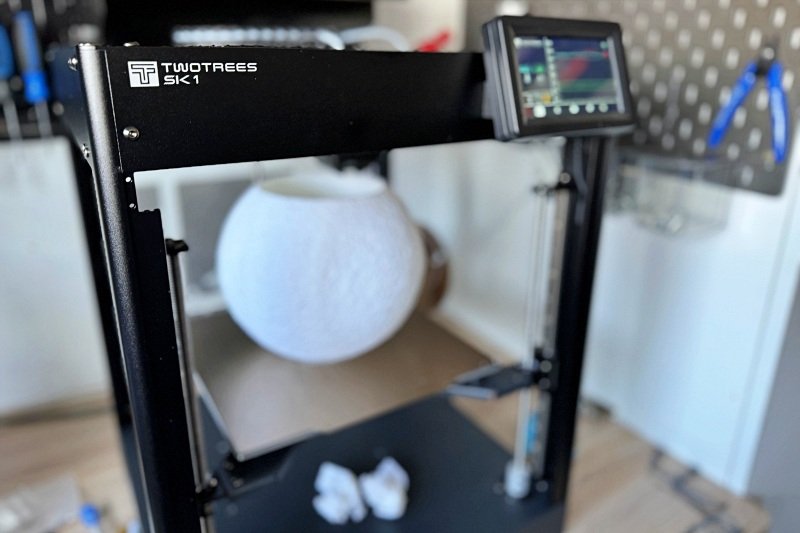
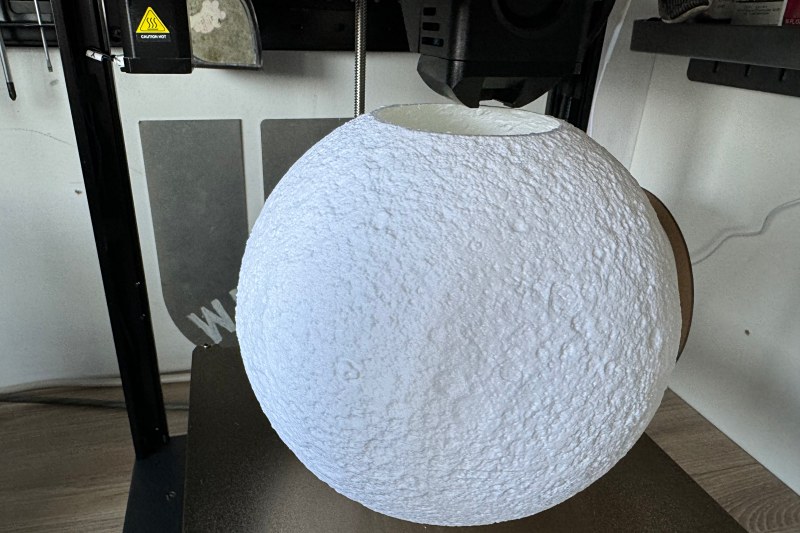
As far as materials go, I usually stick with PLA or PETG. TwoTrees sent along their high-speed PLA, which was remarkably consistent. Here is a high resolution print of the moon that I tested. The detail was impressive.
The heated bed also supported some prints with large overhangs without support structure really well, like this previous attempt at an Allen key holder that I designed in the Shapr3D app for the iPad.
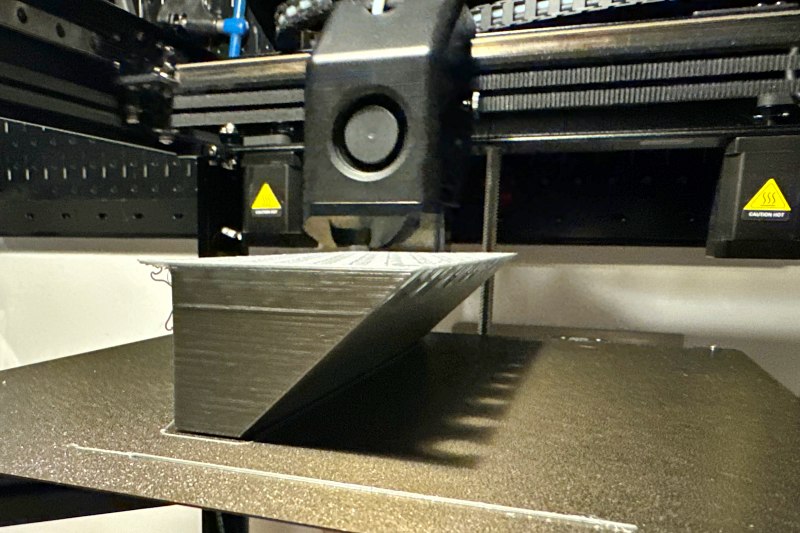
Here is the revised print to use less material and angle the wrenches.
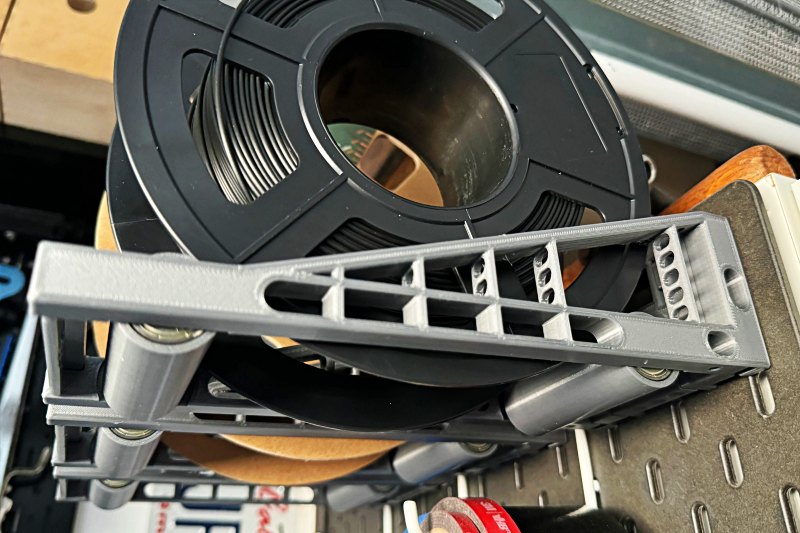
I also printed some filament bearing rolls that are compatible with the IKEA Skadis grid. They came out like this.
Here is a video of the work in progress where you can see the speed, accuracy and get an idea of the noise of the machine.
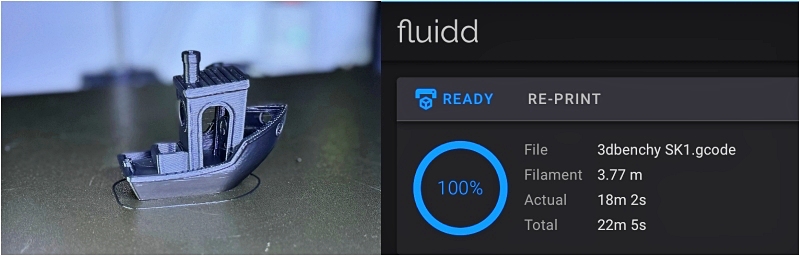
And finally a benchy for reference. Very clean and very fast.
What I like
- Super-fast and consistent prints
- Larger print sizes of 256 mm³
- Wi-Fi printing and management
- Built-in lights
What I would change
- Better assembly and usage instructions
- The touchscreen occasionally stops responding and requires a restart
- WiFi occasionally drops out when the remote control cannot connect
Final thoughts
With a retail price of $599, the TwoTrees SK1 CoreXY 3D Printer is easy to set up and will have you printing successfully in no time. Although the instructions can be a bit vague, they’re enough to get you started, and the web interface offers more control than most users need. Find your favorite planer and get started.
Price: $599 – Currently $499, unbundled with US plug
Where to buy: Two trees
source: The sample of this product was provided by TwoTrees.
