Anker is a brand best known for power banks and phone accessories. So I wasn’t sure what to expect from the company’s first 3D printer. It turns out it’s pretty amazing, one of the simpler models I’ve ever used and definitely the fastest. But how does the AnkerMake M5 perform overall? Is it a good choice for beginners and hobbyists? What about experienced users? After spending some time creating dragons, spaceships and other 3D objects, I’m now ready to pass judgment. Here is my review of the AnkerMake M5 3D printer.
(Note: This includes updates after six months of using the device. During this time I experienced some additional frustrations due to software updates and reduced print bed adhesion, but overall I still find the M5 to be a fast and useful printer.)
anchor
VERDICT: The AnkerMake M5 eliminates several common problems associated with 3D printing, making it a new favorite. But it is quite expensive and beginners still need to learn some basics.
Advantages
- Super fast printing
- Easy to assemble and use
- Removable, flexible magnetic print bed
- Integrated camera with live feed and time-lapse recording
Disadvantages
- The filament often gets stuck during the first feed
- Imperfect automatic leveling
- Camera position and quality are not great
$500 on Amazon, $700 on Antonline, $799 on Newegg
AnkerMake M5 design and setup
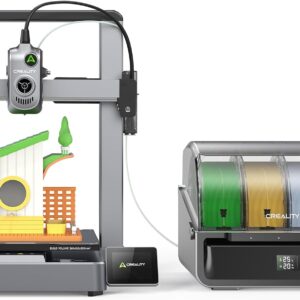
The M5 is one of the most visually striking 3D printers I’ve ever seen, a glossy two-tone machine that looks like industrial art. The touchscreen control panel is built into the right column, which is a bit strange (because it moves up and down like the print head) but isn’t a problem.
For the most part, assembling the machine was a breeze; only the Creality Sermoon V1 required fewer steps. The user manual describes every step of the process, including unpacking the printer. (However, I wish the text was larger and the illustrations a little clearer.) Cleverly, the foam packaging plays a role in supporting the portal so you can attach the base. A few cable connections and a handful of screws later and the machine is ready for use. The entire setup took me about 25 minutes; If I had seen this video, I could have easily done it in 15 minutes. In fact, there are more and better guides on the AnkerMake website; I highly recommend starting there.
The AnkerMake M5 comes neatly packaged and has its own foam inserts to make installing the portal onto the base easier. Watch the setup guide video first and you’ll get through it quickly. (Photo: Rick Broida/Yahoo)
To connect the M5 to your Wi-Fi network, you’ll need the AnkerMake app, available for Android and iOS. You’ll also need an Anker account – yes, another password to create and track. Luckily, everything went quickly and smoothly and installing a firmware update only took a few minutes afterwards.
From there I loaded the AnkerMake slicer software for Windows. To my surprise, the printer was automatically detected on the network. I didn’t have to go through any further configuration. With the software, you import 3D printing files (from sites like Cults3D and Thingiverse), optimize the print size and other parameters, preview the job, and then send it to the printer. Like the user interface on the printer’s touchscreen, the software is sophisticated and admirably simple. However, anyone new to 3D printing will definitely want to spend some time with online tutorials and videos; There are basic processes, e.g. B. the supply of filaments, which are not covered in the manual.
You can also print directly from the mobile app, although this limits you to a few dozen sample models. There is currently no way to access files via a cloud account, for example. That’s unfortunate, because the app is excellent in other ways too: it lets you check status, change settings, and stream a live feed from the camera.
The newly updated AnkerMake app is beautifully designed and very intuitive and offers full control over the M5 printer. However, it is not a slicer and you cannot access print files from elsewhere. (Photo: Rick Broida/Yahoo)
Features and performance of the AnkerMake M5
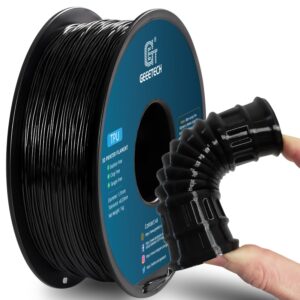
The M5 meets all the important criteria of a modern 3D printer: heated bed, automatic leveling, magnetic flexible steel printing plate and integrated camera. It has a print area of 235 x 235 x 250mm, which is a decent size for a hobbyist printer – just enough room to print most of an Iron Man helmet, for example. You can feed it PLA, PETG, TPU or ABS filament.
Anker promises print speeds of up to 500mm/second (in fast mode), although the default is 250mm/s. Many other printers reach a maximum speed of 200 mm/s, and some even manage half that speed. The first time my test unit came to life for a test print (a small boat) it kind of startled me. There were loud clicking and grinding noises, the print bed oscillating so quickly that the machine actually shook the desk (which, to be fair, was a little wobbly). I’ve never seen a 3D printer move so quickly, but luckily it didn’t fall apart – and the resulting bench looked pretty good overall.
Rome wasn’t built in a day, but this Eiffel Tower came together pretty darn quickly. The AnkerMake M5 is up to five times faster than other 3D printers. But do you see the stringing? The standard nozzle temperature was set too high. (Photo: Rick Broida/Yahoo)
However, despite going through the auto-leveling process (which takes a whopping 10 minutes), I found that the print head ended up just a hair too close to the print bed, which caused the nozzle to scrape the first layer a bit and a whole lot more trouble when removing the skirts (outer edge) after the prints were finished. This is traditionally solved by adjusting the “Z-offset”, i.e. the nozzle height. Unlike some printers that bury this setting or make it difficult to execute, the M5 offers a dedicated Z-Offset menu that’s just two taps away (or one if you’re in the middle of printing). I set the value to +0.10 mm and the problem was solved.
That said, the point of auto-leveling is so you don’t have to mess with Z offset; Anker needs to refine this setting to make it work out of the box.
I also think some other default settings were a bit off. Most of my first prints showed some threading, that is, thread-like stripes between different parts. This is probably because the nozzle temperature was set too high (in this case 230 degrees); I lowered it and the problem mostly disappeared.
The M5’s touchscreen interface is excellent, but do you see the camera embedded on the left side? The angle cannot be adjusted and the view is not particularly good. (Photo: Rick Broida/Yahoo)
Another hiccup: Whenever I tried to insert a new spool of filament, it seemed to hit a block before “hanging” in the extruder. I’ve experimented with various workarounds; It’s best to pull out the Bowden cable from above, align the filament manually and then feed it. Once it clicks into place, I put the hose back in. It’s not complicated, but that’s not how it should work.
Once I got over these initial problems, the machine worked beautifully. Adhesion of the filament to the print bed: zero problems. Remove finished printouts: zero problems. (Just lift the magnetic plate and bend it once or twice.) Print Quality: Excellent overall, even in quick mode.
Speaking of which: the speed at which the M5 prints is revealing. For example, I printed a moving dragon, which would normally take up to 24 hours – or at least as long as the aforementioned Sermoon V1 took. The M5 did it in just over seven hours. For a long time, 3D printing was a game of patience; It feels pretty magical to release your favorite models in a fraction of the time.
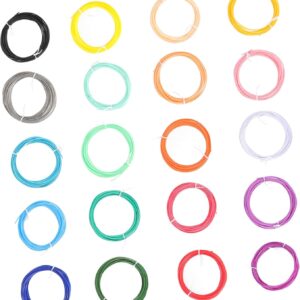
This fully articulated dragon was printed using multicolor filament and took approximately 7 hours to complete. With my other printers it takes 24 hours. (Photo: Rick Broida/Yahoo)
Meanwhile, the built-in camera can stream a live feed in real time at 720p, but also take 1080p time-lapse recordings (suitable for Instagram, TikTok, etc.). I love being able to monitor printing progress via the mobile app or from my computer without having to start and check the printer every 20 minutes. However, because the camera lens is embedded at a fixed angle into the left side of the touchscreen module, your view is less than ideal. At the beginning of printing it’s just the print bed; Most of the image is just empty space underneath. Only when the pressure increases can you get real benefit from the camera. It’s a shame Anker didn’t mount it higher or at least make it adjustable so you can better see what’s happening.
AnkerMake M5 3D Printer: Should You Buy It?
For a first try, the AnkerMake M5 is a really impressive 3D printer. It does a lot right, starting with the design: the hardware is really nice and the software is more sophisticated than most. Assembly is incredibly easy and you can create your first print in minutes.
In fact, the M5 is famous for its speed, and I drink the Kool-Aid. Once you get used to printing things in hours instead of days (or minutes instead of hours), it’s difficult to go back to slower machines. You’ll definitely pay a premium for it – there are plenty of 3D printers available at cheaper prices – but the time savings can help justify the cost.
(Speaking of price: Anker is now offering the AnkerMake M5C for just $399. It forgoes the touchscreen – you control everything with your PC and/or the mobile app – and has a slightly smaller print bed, but also comes with one All-in-one printer equipped Metal hotend that allows for a wider variety of filaments (namely those that require higher temperatures).)
While I’m not sure I’d recommend the M5 to complete newbies who are still learning about filament, nozzle temperatures, and the like, it’s a winner for hobbyists who know what they’re doing. You’ll be up and running in no time and I think you’ll absolutely love the AnkerMake M5.