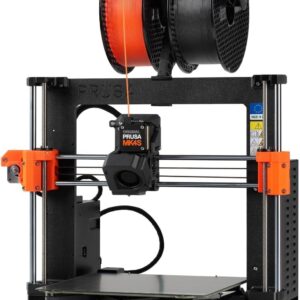
The K1 Max is Creality’s latest entry in the new generation of high-end CoreXY 3D printers. With a slim body and modern interface, the K1 Max promises a smooth printing experience right out of the box, suitable for your home, office or 3D printing business. Has Creality kept this promise? Let’s find out.
Unpack and assemble
The K1 Max and the associated components are neatly housed in the box and secured with Styrofoam packaging. All the user needs to do is assemble the door and touchscreen and attach it to the device.


Three stability screws secure the bed during transport and must be removed before you can use the printer. Creality takes users’ warning seriously. In the field and on the touchscreen you will find several indications to ensure that you are well informed and have every opportunity to prevent a catastrophe.


Removing the screws should be a simple task, but unfortunately all of them were slightly bent by me. Spending a few extra minutes on setup is one thing, but the more important issue is maintenance, which we’ll cover later.
Although the door was easy to install, the current design is a major concern. Installation is easy, but before the magnetic handle is attached, it vibrates worryingly. I had already seen this viral clip of a door swinging and breaking while unpacking, so I was incredibly paranoid. While the chances of damaging the door are small if you are careful, they are not impossible. K1 fans have already designed an improved 270-degree hinge for the door, but Creality would be wise to make its own revisions in-house.
The touchscreen snaps into place easily and the spool holder is installed on the back of the printer. If you’re one of those people who doesn’t like that, don’t worry: there’s an STL file included on the printer’s flash drive for a new spool holder that you can put next to your printer.
Evaluation: 
Set up
Once you’ve assembled the printer, it’s time to start a self-test, which takes about 15 minutes. It’s a pretty simple process, and once it’s done, you’ll be asked to connect your printer to the internet. You can do this either via a local WiFi network or a LAN connection. Connecting the printer to my home network was a breeze.
Next, you will be asked if you want to connect your printer to Creality Cloud. Personally, I’m not a big fan of cloud-based services and a quick look didn’t show me much that piqued my interest. Still, the idea of earning points for discounted filaments and other printer supplies could be a draw for some hobbyist printers and designers.
Let’s switch to Creality Print, Creality’s new dedicated slicer program. It installed easily on my PC and proves to be incredibly user-friendly if you’re already familiar with 3D printing slicers. Although an Advanced Options button hides some of the advanced printing features, the interface is easy to navigate. Creating profiles for different prints or filaments is a straightforward process.
Speaking of filaments, swapping filaments in and out is a breeze with this printer, even with a rear-mounted spool holder.
Evaluation:
Press
The actual 3D printing is where the K1 Max really shines. Printing the pre-installed Benchy in the included white Hyper-PLA took about 15 minutes. Due to its composition, Hyper Series PLA is expected to print faster and produce better parts compared to regular PLA. I was skeptical at first, but the print quality of Hyper Series PLA is undeniable.
Apart from a small problem on the first layer, my first print was almost perfect. The Hyper-PLA prints quickly and incredibly smoothly, not to mention the fact that it looks great. It took me about an hour from unpacking to trying out my first Benchy, an experience that completely surprised me!
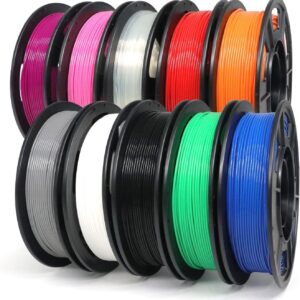
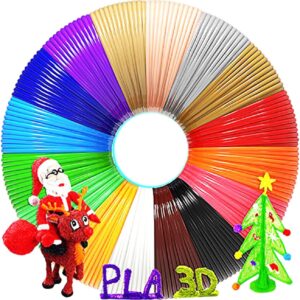
 From left to right: Benchies made from Hyper Series PLA, Standard PLA and Wood PLA – all with the same G-Code pre-installed.
And I was continually amazed at the speed and quality of this device’s prints. Going from an Ender 3 v2 to this K1 Max feels like a huge leap in technology. There is no real crafting or fussing involved, just cutting and printing. Wife wants an earring holder? Completed.


Small trash can for your desk? No problem.

Janky old light switch cover? Replaced.

Upcoming Dungeons & Dragons session? Let’s print a mini.

Display stand for my favorite comics? Bet we can print that?


That’s not to say that every print I’ve tried has turned out perfectly. I have a bucket full of wasted filament that tells a different story. But 99 percent of the problems I had with printing were due to the files being poorly cut or the bed needing a light glue stick for better adhesion. In fact, you can see such a flaw at the base of the 3D printed comic stand.
Only for the other percent of failures would I really fault this system’s alleged AI detection. Unable to generate an error or stop a job when partial prints fell onto the build plate. In fact, AI detection was much more likely to stop a print after the first few layers than to activate during an error during the print process. I’m still a little unclear on the details, but it seems like some of the printer’s AI detection features only work when used in conjunction with the cloud. It also stops printing if a “foreign object on the build plate” is detected – a situation that in my case was due to too much glue being applied to the bed.
I would also have to mention my problem with the built-in camera. It’s a very cool feature that allows you to monitor prints in real time from Creality Print or from your phone via the printer’s IP address. While it’s great for recording time-lapses of print jobs, it’s largely useless for going back and investigating issues that caused print jobs to fail, as it appears to cut off video when it records that a print has stopped.
Beyond that, everything else about the printing experience here is fantastic. The building plate is huge. Inserting and replacing filaments is easy. I thought I might have problems sending files to the printer over WiFi, but there was never a single problem.
The only real problem with this device is that it is incredibly loud on default settings and has a tendency to shake any table or surface that isn’t perfectly stable. You can mitigate this by adjusting the fan and speed settings in your food slicer. But with the default settings, I don’t think it would be possible to make calls using one of these devices in your office. I wouldn’t blame the printer for this, though, because I wouldn’t be able to make a phone call if my blender, air fryer, or food processor were running in the kitchen.
I also need to draw attention to the printer’s housing. When you close everything, the built-in filter effectively eliminates odors typically associated with melting filament. However, these scents are more noticeable with longer prints.
Evaluation:
Post-treatment
One of my biggest concerns with the K1 Max is that maintenance and repair could be a major headache due to the multitude of new features packed into it. It’s one thing to replace a few springs on a bed slinger, but to replace the LIDAR on one of them?
Luckily, Creality offers a range of after-sales maintenance videos on everything from jet replacement to bed leveling. These videos aren’t perfect, but the community around the system is strong and growing every day. There are numerous YouTube and Tiktok tutorials with tons of tips and tricks on how to maintain your printer.
Unfortunately, clear videos don’t always make for clear, simple processes. Replacing the nozzle requires disassembling the hotend, a task I don’t appreciate for the purposes of this review. If you know how to assemble the printer, it is doable. However, this factor needs to be weighed up if you plan to change nozzles frequently on multiple machines.
Speaking of bed leveling, remember those bent screws from before. Creality expects you to use the same screws that secured the printer bed during shipping to secure the bed during maintenance, particularly when leveling. Since my screws arrived bent, they are unusable for this process. For this reason, I ultimately decided to use the “tooth jump” method of leveling the bed. It’s a bit awkward to move the Allen key between the case walls, but it’s not impossible.
Between Creality’s own content and what K1 users share, there really don’t seem to be any problems with this printer that couldn’t be fixed with a little elbow grease and twenty minutes of dedication.
Evaluation:
If you’re looking for an easy-to-setup device for your home, office, or educational environment, I think the K1 Max would be a fantastic choice. Maintenance is minimal and constant care is not required. In certain environments it may be necessary to adjust fan settings to reduce noise, but noise is an easy trade-off for undeniable speed and excellent print quality.