The first thing I wanted to make with my shiny new Creality Ender 3 Pro was a lithophane – a 3D printed black and white photo that comes to life when you shine strong light through it. As it turns out, lithophane sheets are difficult to print with a bed-slinger, take all day to make, and are pretty boring to look at unless you have them backlit all the time.
Color lithophanes are even harder. You can either stick a translucent color photo behind the plastic – lame – or painstakingly recreate the four-color process of mixing cyan, yellow, magenta and black with an AMS system on a printer like the Bambu Lab P1P.
The 21st century has finally caught up with the humble lithophane. Enter HueForge, a groundbreaking app that lets you 3D print, for lack of a better term, solid lithophanes. The program was developed by Steve Lavedas of Horn & Rhode Art and is currently available starting at $12 per year.
Instead of shadowy bas-reliefs, HueForge lets you print in layers of color. Even if these prints are only a few millimeters thick, interesting 3D illusions can be achieved. The community around HueForge has called the system “filament painting” because the technique involves applying ultra-thin translucent layers that combine to form new colors, similar to paint. For example, the hummingbird below doesn’t use green filament, but rather a mix of yellow, blue, black and white.
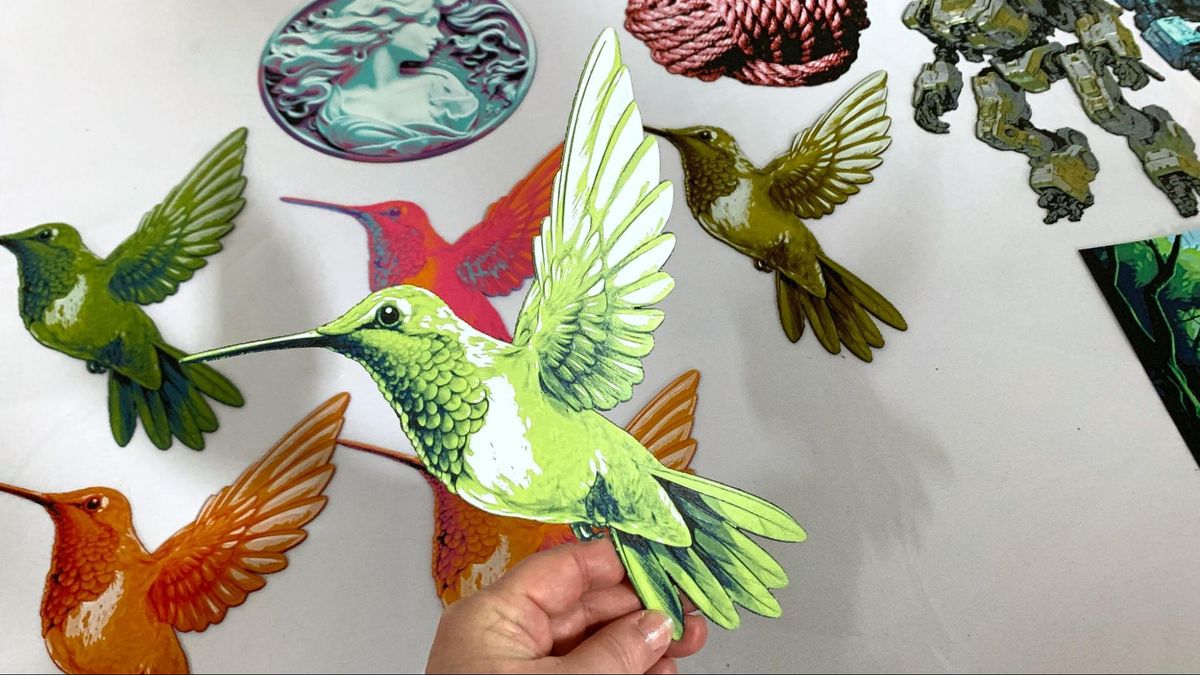
The HueForge hummingbird from ZombieHedgehog (Image credit: Tom’s Hardware)
HueForge is not a design program or a slicer, but something that fits in between. You feed it image files and your palette of filament colors. You can then calculate where color changes need to be made based on the transparency of the filament you are using in the print. Then export an STL file and process it with your favorite slicer.
Polymaker supports HueForge
Recognizing a unique opportunity to support HueForge, Polymaker immediately set up a discussion area on its Discord and had photographer James Simpson test dozens of colors. The company also offers a filament voucher for first-time users of the software. That makes sense – since much of Polymaker’s materials are integrated into HueForge, people are more likely to buy new spools than go to the trouble of testing their own filament.
That’s right. Before you can use any of your filaments in the HueForge system, you need to perform some tests to determine the level of transparency. Thanks to Lavedas and Simpson, there is already quite a bit of filament in the system.
HueForge is open to any other filament manufacturer who would also like to offer a library file of colors.
The test is not that difficult and only requires a quick printout. Directions can be found here.
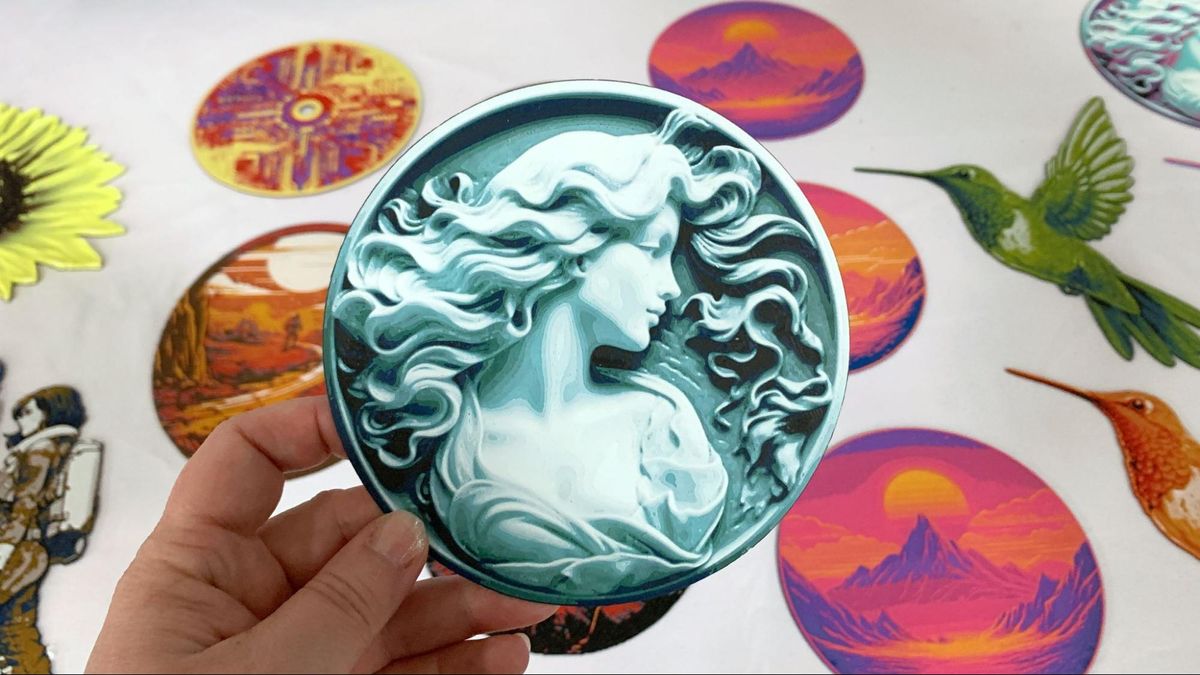
Stephen Laveda’s Color Blended Relief Cameo, a HueForge demo model (Image credit: Tom’s Hardware)
You don’t have to be an artist to get good results with HueForge, but you do need patience and a full range of filaments. Many of the program’s early adopters create fascinating works of art with Midjourney, but any image saved in PNG or JPG format can be used.
I would suggest starting with one of the pre-built HueForge files posted on Printables.com to get a feel for the system and optimize your printer. You don’t need anything special, just the ability to pause to change color. A 0.2mm nozzle is helpful, but I’ve seen perfect results on a Bambu X1 Carbon with a 0.4mm nozzle and an AMS for automatic layer change.
How to use HueForge
Navigating HueForge’s interface can be overwhelming, but there are several tutorials on YouTube to help you. First, start with the user interface tutorial and then move on to HueForge Filament Painting.
What you need to use HueForge
- A copy of HueForge
- Filament in different colors
- Image file
- Canvas (optional)
How to use HueForge to 3D print a color lithophane
1. Choose an image. Start with an image – I will be using my portrait photo from social media for this tutorial.
2. Remove the background And Run the image through a black and white image Filter to get the best results. A free program like Canva can do both.
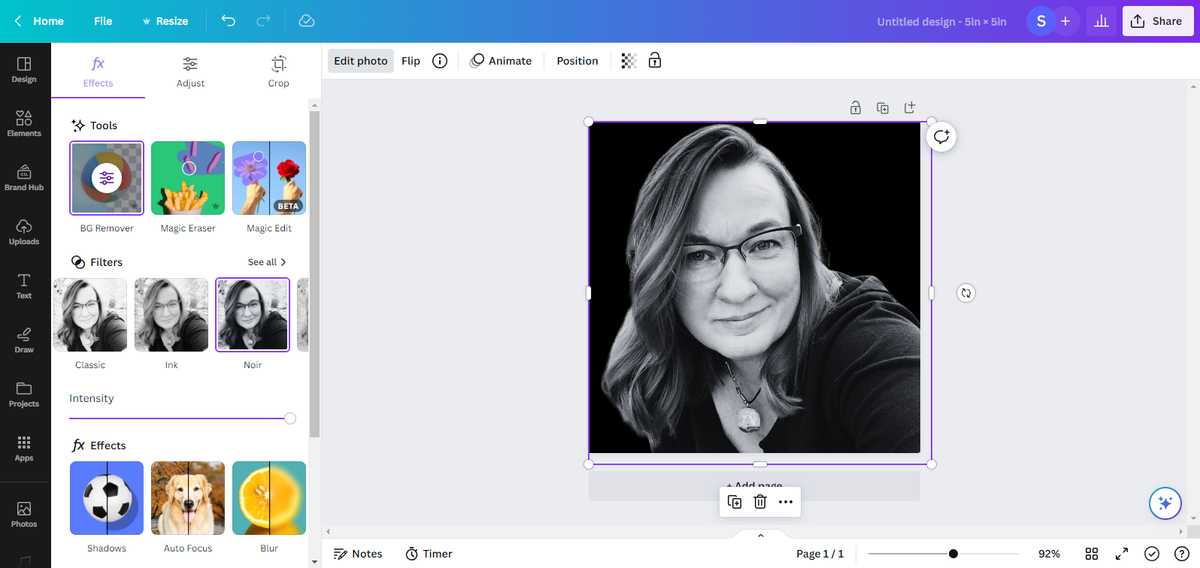
(Image credit: Tom’s Hardware)
3. Save the file as PNG And Place it in the HueForge program folder.
4. Open the image in HueForge.
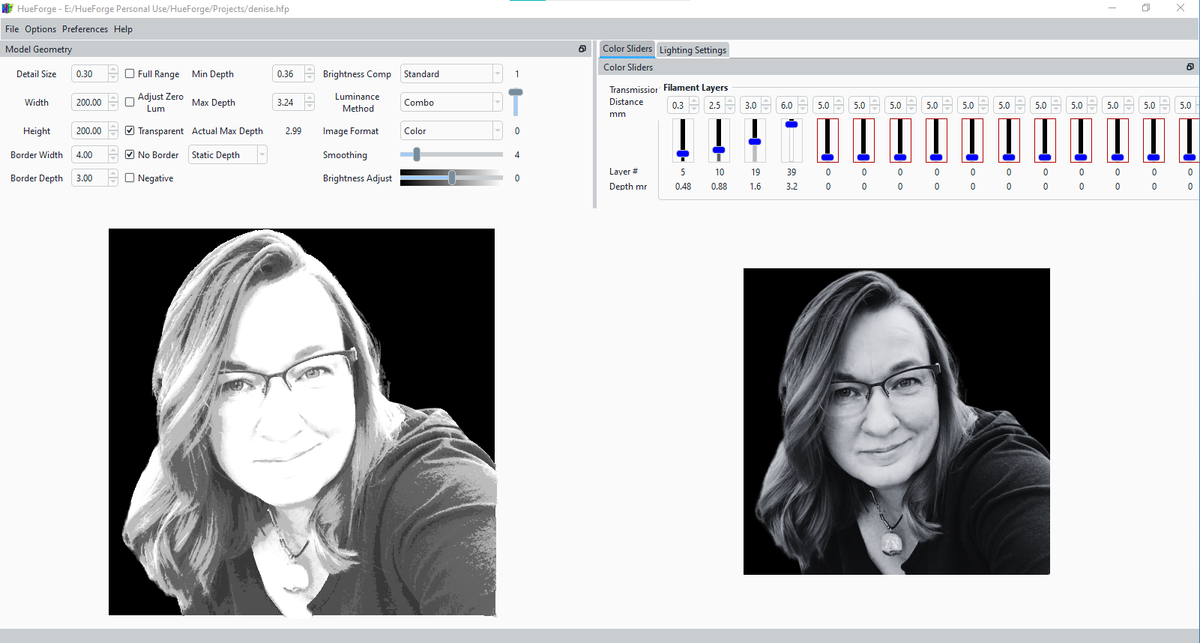
(Image credit: Tom’s Hardware)
HueForge uses a black and white PETG profile by default. The filament library lists all available colors and you can add more after testing them for “transfer distance”.
5. Select the colors you want to use.
6. Drag the colors into the color controllers.
Since I didn’t have many base colors of Polymaker, I happened to use Inland PLA in black and white, which are hopefully close enough to Polymaker in transparency. I did a quick test with a roll of Prusament Viva la Bronze and it looked like a gold that was already in the system. I simply renamed it Prusament and added it to the slider that was previously set to gray.
7. Adjust the sliders until you are satisfied with the results.

(Image credit: Tom’s Hardware)
8th. Select the Model Geometry window And Resize – For faster printing I used 75 x 75 mm.
9. Click “Save Project As”. And give it a name. HueForge automatically creates an STL file.
10. Open your slicer. I used Bambu Slicer and ran it with an AMS over the P1P. I could run it through almost any printer, but I would have to manually replace the filaments. With the P1P I can set it and forget it for a few hours.

(Image credit: Tom’s Hardware)
11. Set your layer height to 0.08 mm and that first layer on .16mm.
12. Set the fill to 100%.
13. Adjust the color changes according to the instructions HueForge provides you with what you can find by clicking the “Describe” button in the “Filament Layer” window.
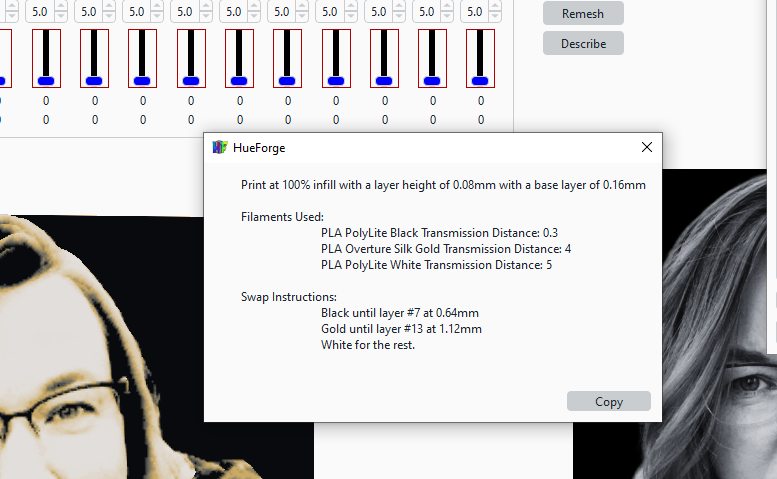
(Image credit: Tom’s Hardware)
With Bambu Slicer, color changes are set in the preview window by right-clicking the layer slider on the left side of the screen. I needed two filament changes on levels 7 and 13 for this image.

(Image credit: Tom’s Hardware)
My initial result was a bit white, but I reprinted the photo with a more translucent white and had a much better print. HueForge requires a bit of experimentation, so I recommend making smaller, faster test prints before committing to a larger print.
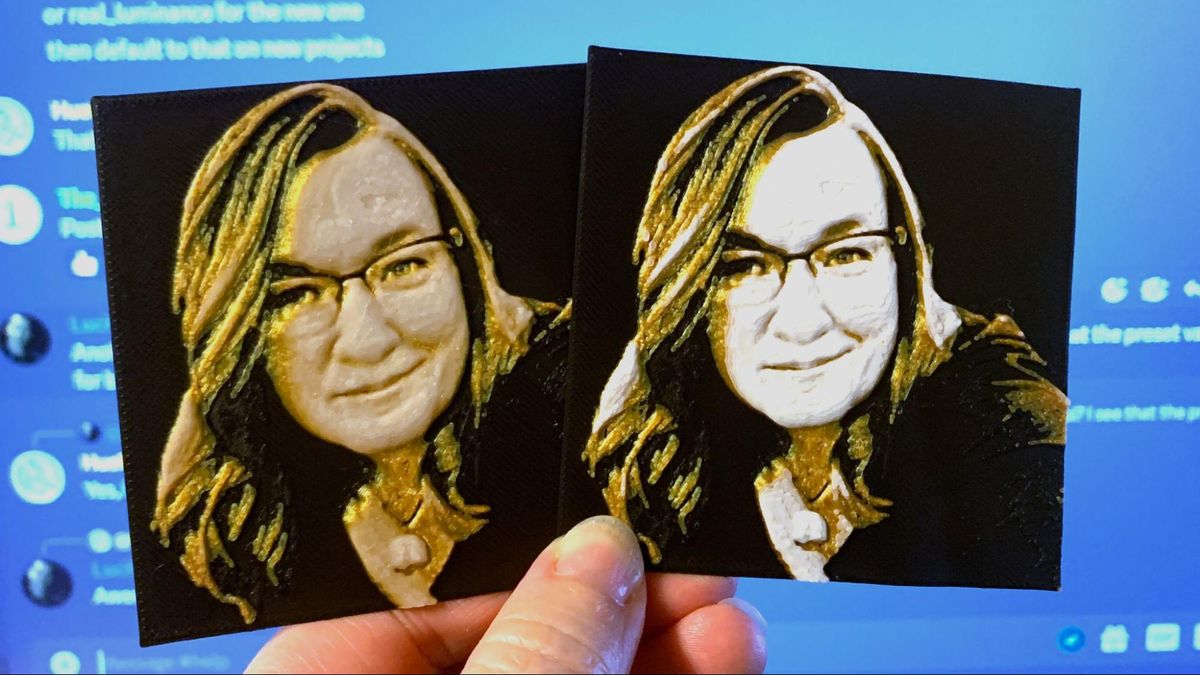
(Image credit: Tom’s Hardware)
HueForge is currently only available for Windows 10/11, but Mac and Linux versions are in the works.
*Special thanks to Zombie Hedgehog and Dstrbdmedic167 who printed and shared their models at Polymaker during the 2023 Midwest RepRap Festival.
MORE: Best 3D Printers
MORE: The best budget 3D printers
MORE: Best Resin 3D Printers