3D printing can seem daunting to many people. Heck, it can even seem magical. Some of what makes getting into the hobby is a lack of understanding, the complexity of machines, and the price.
Bambu Labs is working to solve much of that with the A1 Mini. This machine and software are pretty great, thanks to an experience as close to plug-and-play as you can get.
Add multi-color printing to the mix for under $500, and the Bambu Labs A1 Mini is a fantastic way to get into the hobby for the first time or to begin working with multi-color prints without breaking the bank.
Disclaimer: This review was made possible thanks to a review unit provided by Bambu Labs. The company did not see the contents of this review before publishing.
Bambu Labs A1 Mini: Price and availability
Bambu Labs released the A1 Mini in the Fall of 2023. The printer was the first non-enclosed device, serving as an entry-level product. Since then, the company has released a larger model, the A1.
As for where you can pick up your own A1 Mini, Bambu Labs sells it directly through its own website in two configurations. One is for the printer alone, for $299. So you get the A1 Mini without the AMS Lite for multi-color printing, which you can purchase separately later if you choose for $249.
However, if you want to start with the AMS Lite, you’re looking at $459. Aside from purchasing through Bambu Labs, you can also find the printer and AMS Lite combo at Micro Center for the same $459 price tag.
Bambu Labs A1 Mini: Getting started
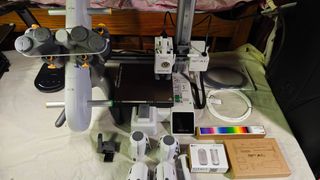
A picture of the A1 Mini, AMS Lite and parts, tool kit, filament swatches, sample filament, and lamp kit. (Image credit: Chris Wedel/Windows Central)
Regardless of whether you have been 3D printing for years or you are just getting started, the idea of being able to open the box and print in under 15 minutes is awesome. Sure, building your printer can be a great way to learn about the device, but it’s also nice to just get going. With the Bambu Labs A1 Mini and its AMS Lite, I had my first test print going in about 13 minutes. The only other printer I’ve used that was up and running faster was the Flashforge Adventurer 4, but it’s enclosed and fully assembled when shipped.
It could be faster if you choose not to go through the printer’s configuration wizard initially, but that’s not a great idea. That’s because it ensures that everything is level and properly calibrated. This process includes checking the Z-offset, bed level, vibration resonance, and nozzle pressure, which can also be done when you start each print job.
Part of what makes this printer so great is how quiet it is, and it does something really interesting in addition to the other calibrations during the initial setup. The printer will spin up each motor and fan to detect and calibrate the vibrational feedback to reduce vibrations and motor noise during the printing process, which Bambu Labs calls Active Motor Noise Cancelling. It’s awe-inspiring how well this works. Something else that happens during the initial calibration, along with bed leveling
Image 1 of 3
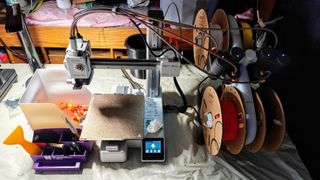
A1 Mini empty build plate and a box to catch print scraps.(Image credit: Chris Wedel/Windows Central)

With the initial configurations set and the provided test, Benchy printed. I was now ready to set up my first multi-colored print using the AMS Lite. AMS stands for Automatic Material System, and Bambu Labs has been using this with its more premium printers for a while now. But the variant used for those machines won’t work for the A1 Mini.
The AMS Lite can hold up to four spools of filament. Bambu Labs provided me with some sample rolls of some of the best PLA for everyday printing and a roll of PETG to test on the machine. Aside from being a pretty great filament, what makes using Bambu Labs rolls of material with the AMS Lite so great is that each spool has built-in RFID tags. This means the system will automatically recognize the type and color being loaded.
Bambu Labs does sell refills that can be loaded back onto the spool you already have to help save you some money and let you keep that convenience factor. But, I used plenty of non-Bambu Labs filaments with the A1 Mini. When loading these into the AMS Lite, you will enter the type of material and the color. This all comes into play in the slicing software later.
Swipe to scroll horizontally
| Specs | Bambu Lab A1 mini |
|---|---|
| Dimensions | 347 x 315 x 365 mm |
| Build volume | 180 x 180 x 180 mm |
| Weight | 5.5 kg |
| Display | 2.4 inches 320 x 240 IPS Touch Screen |
| Internal storage | Micro SD Card |
| Printheads | One |
| Max print speed | 500 mm/s |
| Travel speed | Up to 10000 mm/s |
| Max bed temperature | 80 ℃ |
| Max nozzle temperature | 300℃ |
| Nozzle diameter | 0.4 mm included, 0.2 mm, 0.6 mm, 0.8 mm |
| Camera | ✔️ |
| Air filtration | 🚫 |
| Noise level | 48dB |
| Filament compatibility | PLA, PETG, TPU, PVA |
| Connectivity | Wi-Fi, Bambu-Bus |
| Additional features | Filament Run Out Sensor, Filament Odometry, Power Loss Recover, Filament Tangle Senso |
The Bambu Labs A1 Mini can print PLA, PETG, TPU, and PVA materials. However, the flexible TPU does not work well in the AMS Lite. But you can put your roll of TPU on the external holder, feed it through the PTFE Tube, remove one of the tubes from the AMS Lite adapter, pop in the PTFE Tube for the TPU, and you’re ready to go.
The A1 Mini’s touchscreen display does a good job of walking you through the filament loading and unloading process. You’ll tap on the filament icon and then use the AMS or the External tabs to begin that process. Once you choose whether you are loading or unloading, the printer will show you the steps it works on until the process is complete and you’re ready to go.
Back to the top ^
Bambu Labs A1 Mini: Software and ecosystem
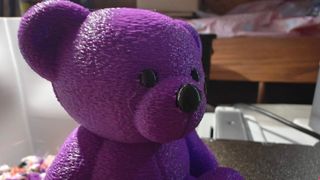
Purple and black “fuzzy” teddy bear (Image credit: Chris Wedel/Windows Central)
OK, so you have a great printer. But without great software to go with it, that machine isn’t going to do much for you. So, on that front, Bambu Labs has its own slicer software called Babmu Studio to get your designs from an editable file to a printer file.
While this software is available for the best Windows laptops, desktops, and Mac computers, there is also an app for your phone called Bambu Handy. The app is pretty, uh, handy for checking on the progress of your prints when you aren’t around your printer. You can even browse prints from MakerWorld and send them directly to your printer to print. I like the idea of this, but I prefer being able to slice the file in Bambu Studio to ensure everything looks good before sending it on.
If you look for designs on MakerWorld in a browser, you can view, like, and save, which can be done in the app, but you can also open the design directly in Babmu Studio on your computer to begin editing it. This is part of what makes using a Bambu Labs printer so great. Because so many parts of the printer and software can be integrated, you have a much more seamless experience from start to finish.
Image 1 of 5


As for using Bambu Studio, it is a pretty good slicer. It is based on PrusaSlicer by Prusa Research, but the company has its own twist on it. The software has pre-loaded all of the brand’s printers, so getting everything set up and ready to go is quick. With your design loaded into the printer, you then get to start adjusting the settings to match your print goal.
All the expected options exist for layer heights, infill, supports, speeds, and more. Then, you have adjustments for the design orientation on the build plate, dimensions, copies, and the like. However, the addition of the AMS Lite and multi-color printing adds a wrinkle to the typical printing process.
Bambu Studio includes the features necessary to “paint” your design with the colors you have loaded onto the AMS Lite, which you sync from the printer to the software. This is where that part about entering the type of material the color from before comes into play. These colors are what become available to you within the “painting” process. While the software gets the job done here, it can be a bit finicky.
Image 1 of 3


Because a design you are working on in Bambu Studio is 3D, making it multi-colored can be tricky. The more separate parts, angles, and spaces you have, the more you’ll have to manage in the coloring process. The Paint tool has a few options within it to help. One that can be super helpful is the Smart Fill tool. By enabling edge detection and adjusting the slider for the smart fill angle, you can change the color of an entire area with a single click. Assuming the design is initially created properly, it works very well.
There are other tool types to customize the colors of your print that let you manually draw on the design. Some are flat, and others are 3D, which is great for curved surfaces. When working on 3D objects, it can be easy to forget little things within a design and miss painting them. It would be great if you could tell the Paint tool to change everything from a specific color to a different color. That would be perfect!
Image 1 of 2


When printing in multi-color, there are a couple of things to keep in mind. It can create a lot of waste, which I’ll dive into more in the next section. Three ways the software can help with this by adjusting how much filament is extruded when changing colors, called flushing volumes, flushing into supports, and flushing into the prints infill. Adjusting these things can help, but keep in mind if you flush the infill from a dark color into a lighter color, you may see it from the outside of the finished print.
The other thing to keep in mind is the print time. Changing the filament on the Bambu Labs A1 Mini takes some time. For each color change, the printer manually cuts the current filament off, retracts it, flushes it into the support and infill if enabled, puts some into the wiping tower, and then pushes the rest out. After that, the A1 Mini must load the new filament until the old color is gone, print on the wiping tower, and resume the print. You can see in the images above how much longer it takes to print a simple two-color design versus a single-color print.
Back to the top ^
Bambu Labs A1 Mini: Print quality
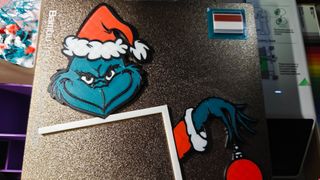
Multi-color print of a Grinch holiday design (Image credit: Chris Wedel/Windows Central)
Right off the bat, I was impressed with the speed, noise, and print quality of the small printer. The A1 Mini, as expected, has a pretty petite 180x180x180 mm, which is about 7.1 inches in print capacity. So, you won’t be making any full-size masks for your next cosplay event here, but it is still a useful print area.
The included stainless steel nozzle can reach up to 300℃ and the print bed 80℃. These temps allow the A1 Mini to crank out great quality from various materials. When I say crank out, I mean it with a print speed of up to 500mm/s. But keep in mind that the faster the printer goes, the lower the output quality. It’s not bad by any means, but if you need your print to be very precise, it’s better to slow it down.
Generally, I had very few issues with the printer with any of the materials I tried. The printer handled it wonderfully, whether it was Bambu Labs PLA/PTEG, PLA/PETG from another brand, or TPU. Below are some pictures of single and multi-color designs, larger PLA/PETG prints, and a small TPU design.
Image 1 of 7


Now, while the printer is very good in many ways, it does have some faults in the printing area. As with any 3D printer, there are bound to be failed prints, from layer shifts and adhesion issues to clogged nozzles, it happens. While the Bambu Labs A1 Mini doesn’t do anything to spot print issues and stop them from happening, the filament runs out, and filament tangle sensors help with some headaches.
The camera on the A1 Mini is bad. The image quality isn’t great, and viewing the print process is horrible, and that’s not even counting the bad image quality. When trying to view a live print in the app or Bambu Studio, you’re met with a low-frame rate experience with an image change every few seconds. A better camera and viewing experience could help allow the users to manually intercept issues more easily. A better camera and viewing experience could help allow the users to manually intercept issues more easily.
Image 1 of 5


Above, you can see a few of the failed prints. Some were just an issue with print plate adhesion, which occurred on both the included textured PEI plate and smooth PEI plate. Others were clogged print nozzle issues that I could not find a reason for. After the highly frustrating cleaning process, it was printing normally again.
I have to say that changing out the print nozzle on the A1 Mini is a very easy process. I purchased a .4mm hardened steel nozzle to use, and installing it just requires popping off the print head cover, removing the silicone sock, unbuckling the clasp, and holding the nozzle in place. Then, just slide out the old, slide in the new, and update Bambu Studio with the correct nozzle.
Bambu Labs A1 Mini: Competition
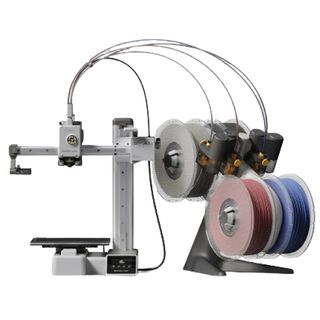
Babmu Labs A1 Mini fully assembled with AMS Lite (Image credit: Chris Wedel/Windows Central)
There are a lot of great 3D printers around these days, which helps make getting into the hobby easier and more affordable. The Bambu Labs A1 Mini starts out at $299 by itself, with no AMS Lite. That is a great price considering all that the machine, software, and ecosystem offer. In that price range, there are plenty of options to choose from, like the Prusa Mini and the Anycubic Kobra 2 Neo, which will have a review coming soon, and for a bit more, there’s the AnkerMake MC5.
Aside from the Prusa Mini, all the other options I mentioned have larger print areas, which can be quite nice. But none offer the ability to do multi-color printing. If you want to do that with the Bambu Labs A1 Mini, you’ll pay $459 for the printer and AMS Lite combo. Yes, that jumps the price up quite a bit, but you are still getting a great machine with a well-done ecosystem, plus the flexibility of multi-color printing.
Back to the top ^
Babmu Labs A1 Mini: Should you buy it?
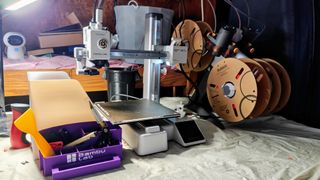
Babmu Labs A1 Mini fully assembled with AMS Lite and a desk organizer (Image credit: Chris Wedel/Windows Central)
You should buy this if…
You should not buy this if…
While I haven’t been in the 3D printing game for a decade, I have used quite a range of machines and logged a lot of printing hours. With that, my time testing the Bambu Labs A1 Mini with the AMS Lite has been a very enjoyable one. Sure, I wish the print area were larger, but for that, I could get the larger Bambu Labs A1. I also would like the ability to have more colors on the AMS Lite at once, and there are some software quirks. But as a complete package, there have been a few times when I was genuinely disappointed in my printing experience with the machine.
The fact that you can get the Bambu Labs 3D printing experience, which at the moment is a big lead over other brands, for $299 is amazing. Then, for another $160, you can go multi-colored with your prints, which is pretty great. So, if you want to get started in 3D printing or dip your toes into multi-color printing, this is a fantastic way to start.
Though small, the Bambu Labs A1 Mini with the AMS Lite is a powerhouse. Print up to four colors automatically in a single design opens up amazing possibilities. What really makes it all work is the excellent automatic machine calibration, software, and integrated ecosystem.
Back to the top ^
