If your nozzle is not working properly, no matter how hard you try to repair it, it will no longer work and may be damaged beyond repair. The only solution is to replace them. If you’ve never thought about making a swap, you’ll have to do it at some point in your 3D printing journey, even if you’re using one of the best 3D printers available. When the time comes and you have the replacement nozzle with you, there are a few important steps you need to follow to ensure the process goes smoothly and effectively. But before we look at that, let’s look at the reasons that might force you to replace your nozzle.
Reasons why you may need to change your nozzle
- Worn nozzle: Over time, your nozzle can wear out from the constant heat and friction, and you may notice this when you see poor quality prints and need to replace them.
- Clogged or clogged nozzle: No matter how hard you try to clean and unclog your nozzle, there may still be a stack of filament inside that you can’t get out.
- Printing with different materials: If you want to 3D print with a material with a different diameter than what you normally use, you will need to replace it.
- 3D printing at high speeds without changing settings: If you want to print a little faster without changing settings, you can use a larger nozzle as it pushes out a lot of filament in a short time. The only challenge with this is that the print quality may not be as good as with a small nozzle.
- Inconsistent extrusion: If you notice this, there is a problem with the nozzle (assuming all other factors remain constant) and you need to replace it.
What you need to replace your nozzle
You will need the following to properly replace your nozzle.
- New nozzle. You can buy it at your local store or buy it online on platforms like Amazon.
- Key to remove the old nozzle and replace the new one. They usually come in different sizes and shapes, but I recommend using the L-shaped socket wrench. They also come in different sizes and you can buy them all.
- Tongs For fixing the various components when removing or attaching the nozzle.
- Gloves. You need these to protect your hands when replacing.
If you have all the tools mentioned above, follow the steps below. Note that the steps may vary slightly depending on your printer type, but these apply to most. On some more closed printers, such as the Bambu Lab range, the nozzle and hotend are one piece and cannot be replaced in this way.
1. Heat the hotend.

(Image credit: Anycubic)
(Image credit: Anycubic)
You need to heat the hotend until it reaches the temperature you were working with when 3D printing or the temperature of your material. This is crucial as it helps to soften any filament that may be inside, because if you try to remove the nozzle while there is solidified filament inside, it may be difficult to unscrew. In addition, the metal parts expand slightly when heated, making them easier to unscrew, unlike when cold, where there may be problems when removing them.
To heat the nozzle, navigate to the temperature settings on the LCD screen. This varies depending on the 3D printer used. Once you find the temperature option, set the nozzle temperature to the melting point of your filament.
2. Unload the filament.

(Image credit: Tom’s Hardware)
While the nozzle heats up, you need to unload the filament. You can find the corresponding option on the LCD screen of your 3D printer. The process varies depending on the type of machine you have. Unloading the filament is crucial so you can remove the nozzle without obstructions or bending the filament. Once the nozzle is hot enough and you have unloaded the filament, you can move on to the next step of removing the nozzle.
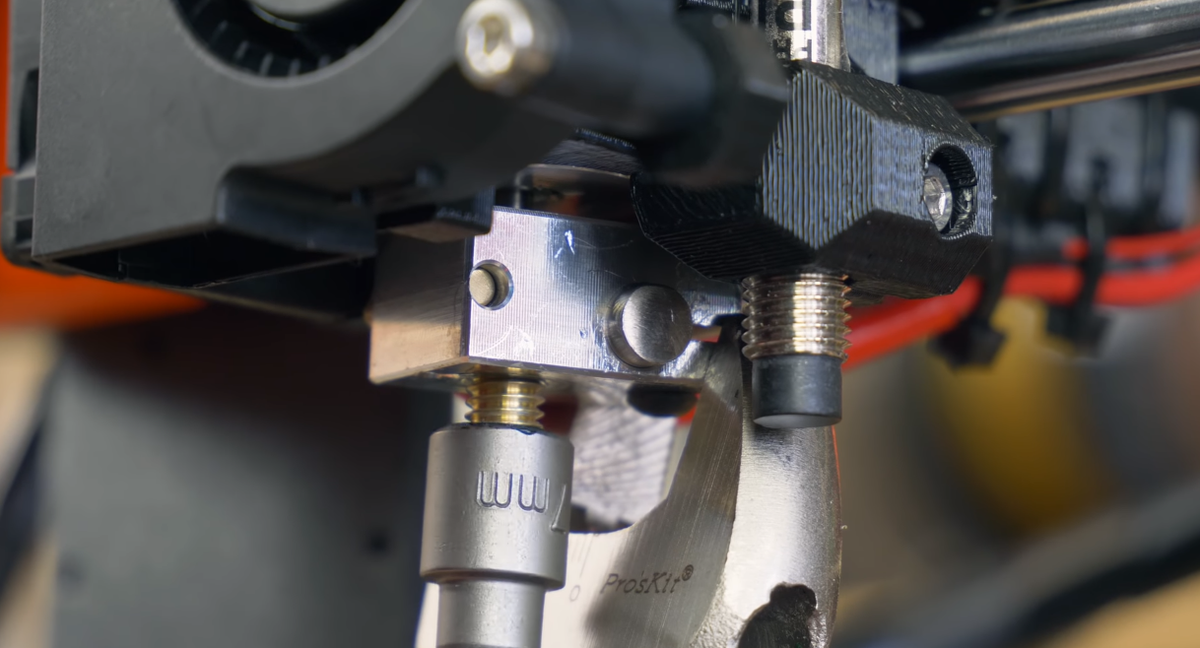
3. Remove the nozzle.
(Image credit: Prusa 3D)
Move the Z axis up slightly so you have enough space to easily remove the nozzle.

(Image credit: Tom’s Hardware)
Put on your gloves, position the wrench on the nozzle and twist to unscrew it. If you don’t have a socket wrench, you can use a wrench that comes with your 3D printer. While unscrewing, hold the other components with the pliers. Be careful not to touch the nozzle with your hands, otherwise you may burn your hand. You should also use moderate force to avoid damaging other parts.
If you are using a 3D printer like the Ender 3 V2, you will first need to remove the outer nozzle housing before removing the nozzle as shown below.

(Image credit: Rickey Impey)
After removing the nozzle, you cannot install the new one.
4. Install the new nozzle.
(Image credit: Prusa 3D)
When removing the nozzle from the heating block, you can proceed in the same way. You first insert the nozzle into the wrench, then place it on the hotend and turn it. If you don’t have a socket wrench, you’ll need to insert it manually before tightening it. Since the heat block area is still hot, you will need to wait a few minutes for it to cool down. This ensures that it is not too hot for safe handling.
You can also check the temperature on the LCD screen to see if it has cooled down enough. Once cooled, you can install it by hand and before you start tightening, make sure you heat the hotend again so you can install it while it is still hot. If you install and tighten it when cold, it may be loose and not make proper contact when hot. When tightening, be sure to hold the heater block with pliers so that it does not move when you turn the nozzle, as this may cause damage to the wires.
What to do after changing your 3D printer nozzle?
Before you click the print button after changing the nozzle, there are a few things you need to set up to make sure your prints turn out well. First, you need to level your 3D printer bed. Even if you’ve done it before, you’ll need to do it again so that the nozzle is in the correct position relative to the bed on all sides.
You also need to check and adjust the Z height so that it is at the same correct height. Additionally, you will need to change the nozzle diameter settings in your 3D printer slicer to match the new one you have installed. Next, load the filament and do a test print to check if the nozzle is working properly.
More: How to Use PrusaSlicer: A Beginner’s Guide
More: 5 Ways to Fix Z Stripes in 3D Printing
More: How to use FreeCAD for 3D printing
More: How to convert OBJ files to STL files for 3D printing
More: How to clean and cure resin prints