Whether it’s clogged or you just want to take good care of it, it’s important to know how to clean your 3D printer’s nozzle. Let’s go through some methods.
Welcome to the whimsical world of 3D printing, where the humble nozzle rules the roost! The star of the show when it comes to FDM (Fused Deposition Modeling) 3D printers, this tiny titan acts as a magical pen tip that turns your 3D fantasies into reality. It melts and extrudes the filament precisely. However, sometimes it happens that the nozzle is clogged. Then it’s like a pen running out of ink and your printing projects eventually coming to a complete standstill. Let’s dive in and learn how to clean your 3D printer’s vital nozzle.
Methods for cleaning a 3D printer nozzle
Exactly how you should clean your 3D printer’s nozzle depends on how clogged it is. This could be a partial blockage, allowing some filament to escape, but could really mess up the supports for your setup. Or it could be a complete blockage – you see your print head moving back and forth but no filament remains.
But first, you may need some tools to really get the job done. Here are a few things that can definitely help clear your clog and get your 3D printer purring like a kitten again.
SIQUK 33 Piece 3D Printer Nozzle Cleaning Tool Set, 30 Piece…
3D Fuel 3D Clean Dyna Purge Printer Nozzle Cleaning…
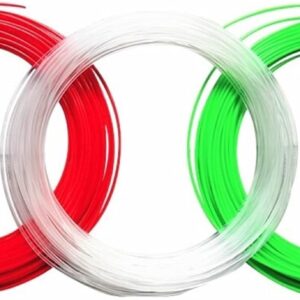
eSUN 1.75 mm, cleaning filament, prevents nozzles and…

SIQUK 33 Piece 3D Printer Nozzle Cleaning Tool Set, 30 Piece…
![]()
![]()

3D Fuel 3D Clean Dyna Purge Printer Nozzle Cleaning…
![]()
![]()

eSUN 1.75 mm, cleaning filament, prevents nozzles and…
![]()
![]()
Amazon.com price updated 12/14/2023 – We may receive a commission for purchases made through our links: Learn more
If your nozzle is just a little clogged
If you only have a partial clog, you should be able to clear it with a cleaning thread or wire brush.
Cleaning filament to the rescue
Your first step to cleaning your 3D printer’s nozzle should be to use a cleaning filament. This is not your average plastic filament. Instead, it’s like the superhero of filaments, dedicated to cleaning rather than printing.

- Follow the instructions for your specific 3D printer and heat the nozzle slightly hotter than your last print job (but not too hot or you will create a filament grill in the nozzle).
- Insert the cleaning thread until it comes out cleaner than a whistle.
- If the clog wasn’t too stubborn, your printer is ready to use again!
Bring the big guns or brushes
If your nozzle looks like it’s rolled up in a pile of melted filament, you may be able to repair it with a brass wire brush. However, please do not use a steel brush as it could scratch your valuable nozzle.
- Heat the nozzle to around 220°C and then gently scrub away the dirt. If you used filament with a higher melting point, heat the nozzle to about 10°C above this temperature.
- For stubborn spots, an alcohol wipe can be your secret weapon.
- Allow the nozzle to cool and then perform a test print to see if the nozzle is clear.
If the nozzle is completely clogged

Of course, sometimes the constipation is much more serious. If it is completely clogged, you will notice that no filament comes out at all. However, not everything is lost yet. There are four tricks you can try to clean your 3D printer’s nozzle and get back in business.
The needle trick
The first thing to try for a complete blockage is needle time.
- Heat your nozzle to the temperature you used for the last 3D printed material.
- Using a needle finer than the nozzle itself, carefully poke it upward through the clog.
- Your printer may be equipped with just the right tool for the job. Otherwise, an acupuncture needle or a guitar string will help. Be careful – we’re not drilling for oil here.
Cold pull, the cool way
With the cold draw method, your goal is to easily separate all of the material in the clog from the nozzle walls.
- Heat the hot end to about 250°C. If you used PLA, heat it to 200°C.
- Push the filament through the print head.
- Allow the nozzle to cool and your filament will solidify.
- Next, heat the nozzle again to a lower temperature, around 115°C. When the temperature reaches 90°C, quickly pull the filament up and out of the nozzle.
- If you see a filament tip shaped like the inside of your nozzle, you’ve done it.
This causes the particles accumulated in the nozzle to adhere to the filament as it solidifies. You may need three or four cold pulls to completely clean the nozzle. As a final tip for this method: make sure you use a soft filament like nylon.
Atomic Pull, the hot cousin of Cold Pull.
The cold drawing method has a relative, atomic drawing. With this method, the heat stays on while you try to clear the clog.
- First, remove the original filament.
- Heat the hot end to 220°C for PLA or 250°C to 260°C for harder materials.
- Once the nozzle is heated, manually feed the new filament until it is extruded.
- For ABS or PETG filament, lower the heat to 160°C. For PLA, lower the temperature to 90°C.
- Once the nozzle is at a lower temperature, pull the filament out from the top.
As with the cold draw method, you know the job is done when the end of the filament looks like the tip of your printer’s nozzle.
Acetone, the last resort
If all else fails, it’s time to give your nozzle a spa day in an acetone (or ethyl acetate for the PLA people) bath.
- Remove the nozzle from the hot end following the method for your specific 3D printer.
- Immerse the nozzle in acetone or solvent for a few hours.
- After 2-3 hours it should be easy to remove the remaining filament particles with a needle.
When all cleaning efforts fail
If you’ve done all of the above methods and you’re still experiencing a clog, it may be time to replace the nozzle entirely. Most 3D printing gurus say that it’s best to replace the 3D printer’s nozzle every three to six months anyway.
Follow the manufacturer’s instructions to warm up your hotend and remove the remaining printer. The heat makes it easier to unscrew the nozzle. Then screw the new nozzle onto the printer head.
Prevent these blockages from the outset
Regular maintenance can help prevent clogged nozzles on your 3D printer. You’ll need to clean after every print to keep your nozzle spotless. However, that’s not all. Imagine your 3D printer is like a picky eater – it doesn’t like dirt and loves high quality food (filament). If you follow these simple tips, keeping it clean and clog-free is pretty easy.
Keep it clean
First, let’s talk about cleanliness. Imagine your 3D printer lives in a bubble – you want to keep that bubble super clean. Dust these surfaces, gently wipe down your printer, and treat your filaments like treasures.
Store them in airtight containers with these little desiccant packets – they’re like little superheroes fighting dust and dirt. Before printing, give your filament a quick spa treatment with a soft cloth or paper towel to brush off any pesky dust particles.
Quality makes the difference
Now about the filament – the printer’s food. Quality counts! Think of low-quality filaments like junk food – they serve their purpose, but are not good for your printer’s health. These cheap options can be uneven and sometimes introduce unwanted bits that can clog up your printer’s work.
It’s like finding a pebble in your sandwich – no fun! Stick with the good products, the reputable brands that promise smooth, reliable printing every time.
Establish good habits for your 3D printing
Last but not least, let’s talk about good habits. Think of each time you change filaments as if you were changing courses in a meal – you want to clean the plate.
Do the same for your printer’s nozzle. For example, when preparing a gourmet meal, make sure you have the right temperature and settings for the filament you are using.
Putting it all together
These methods and tips will give your printer the perfect conditions to create these amazing 3D prints. Remember all these suggestions and you will be the best 3D printer artist.
![]()